When you boot an Amazon Linux EC2 instance it boots with a 8GB EBS volume. If you need more space you need to add additional drives. For this you need to use EBS volumes.
Before you start the process please have look at the current partition blocks loaded in your server. You can do so using the contents of partition file.
bash-4.1# cat /proc/partitions
major minor  #blocks  name

 202        1    8388608 xvda1
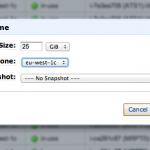
Now you goto EBS volume manager in AWS console and create a new volume, make sure the zone is the same in which your EC2 instance is running.
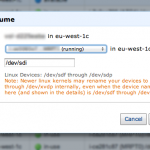
Once the volume is created you need to attach this to an instance. You can right click on the created volume and say attach. Select the instance then device will populate automatically, you can either leave it or change if you need specific device name.
Now check the partition file again. You can see a new device being added.
bash-4.1# cat /proc/partitions
major minor  #blocks  name

 202        1    8388608 xvda1
 202      128   26214400 xvdi
The volume attached is not ready for use. It is like a new hard disk. You need to partition and format the same. In our case I am going to use the full disk as one partition. So I am going to skip the fdisk setup and jumping right into formatting the volume.
bash-4.1# mkfs.ext3 /dev/xvdi
mke2fs 1.41.12 (17-May-2010)
Filesystem label=
OS type: Linux
Block size=4096 (log=2)
Fragment size=4096 (log=2)
Stride=0 blocks, Stripe width=0 blocks
1638400 inodes, 6553600 blocks
327680 blocks (5.00%) reserved for the super user
First data block=0
Maximum filesystem blocks=4294967296
200 block groups
32768 blocks per group, 32768 fragments per group
8192 inodes per group
Superblock backups stored on blocks:
	32768, 98304, 163840, 229376, 294912, 819200, 884736, 1605632, 2654208,
	4096000

Writing inode tables: done
Creating journal (32768 blocks): done
Writing superblocks and filesystem accounting information: done

This filesystem will be automatically checked every 21 mounts or
180 days, whichever comes first.  Use tune2fs -c or -i to override.
The format process can take few seconds just be patient. The drive is ready to use, and to do the same we need mount it.
bash-4.1# mkdir /media/newdrive
bash-4.1# mount /dev/xvdi /media/newdrive/
bash-4.1# cd /media/newdrive/
bash-4.1# ls
lost+found

bash-4.1# df
Filesystem           1K-blocks      Used Available Use% Mounted on
/dev/xvda1             8256952   1298868   6874200  16% /
tmpfs                  3826296         0   3826296   0% /dev/shm
/dev/xvdi             25803068    176196  24316152   1% /media/newdrive
If you wish this device to mount automatically when you reboot the server make sure you add this to your fstab file.
/dev/xvdi /media/newdrive/ ext3 noatime,nodiratime 0 0
When I started which Amazon Cloud, I found these things in a hard way, hope this can help someone 🙂


Thanks, nice clear instructions.
Awesome Buddy. Worked like a charm. Saved me a lot of time 🙂
Thanks buddy.
Worked very nicely, thanks!
Good post.
Why don’t you use ext4 file format instead of ext4?
http://en.wikipedia.org/wiki/Ext4
Thanks for the clear, direct instructions. Very helpful.
Very helpful. Thanks a ton for posting this.
Muy bueno. Simple and great. Thx.
Thanks! That was a very clear explanation.
Excellent, thank you!
Great help! thanks
Great guide, thanks!
Thank you for a brilliant guide!
Please consider changing defaults to noatime,nodiratime in your fstab example as the EBS volume is slow enough as it is.
Thanks Marcus will update it.
http://lwn.net/Articles/245002/ according to this article noatime alone is enough because it sets both noatime and nodiratime.
Thanks a lot dude. Awesome and Very clear instructions
Awesome Imthiaz, thanks a lot, it worked great.
Awesomely helpful! Thanks for taking the time to describe the procedures clearly and completely.
Well done, works like charm!
Thanks a lot!
Thanks very clear instructions
Thanks for the guide and I was searching a lot about mounting the ebs volume on ec2. It really helped me.
Tamil